MA Material Helper
Automatically generates color change menus using Modular Avatar's material control components. Create color change menus from color variation prefabs in just a few clicks, with support for simultaneous generation from multiple prefabs.
Requirement: Modular Avatar 1.13.0 or higher
Usage
- Select color variation prefabs → Right-click →
Copy Color Variants(multiple selection supported) - Select target outfit → Right-click →
Create Color Menu(this item appears after copying)
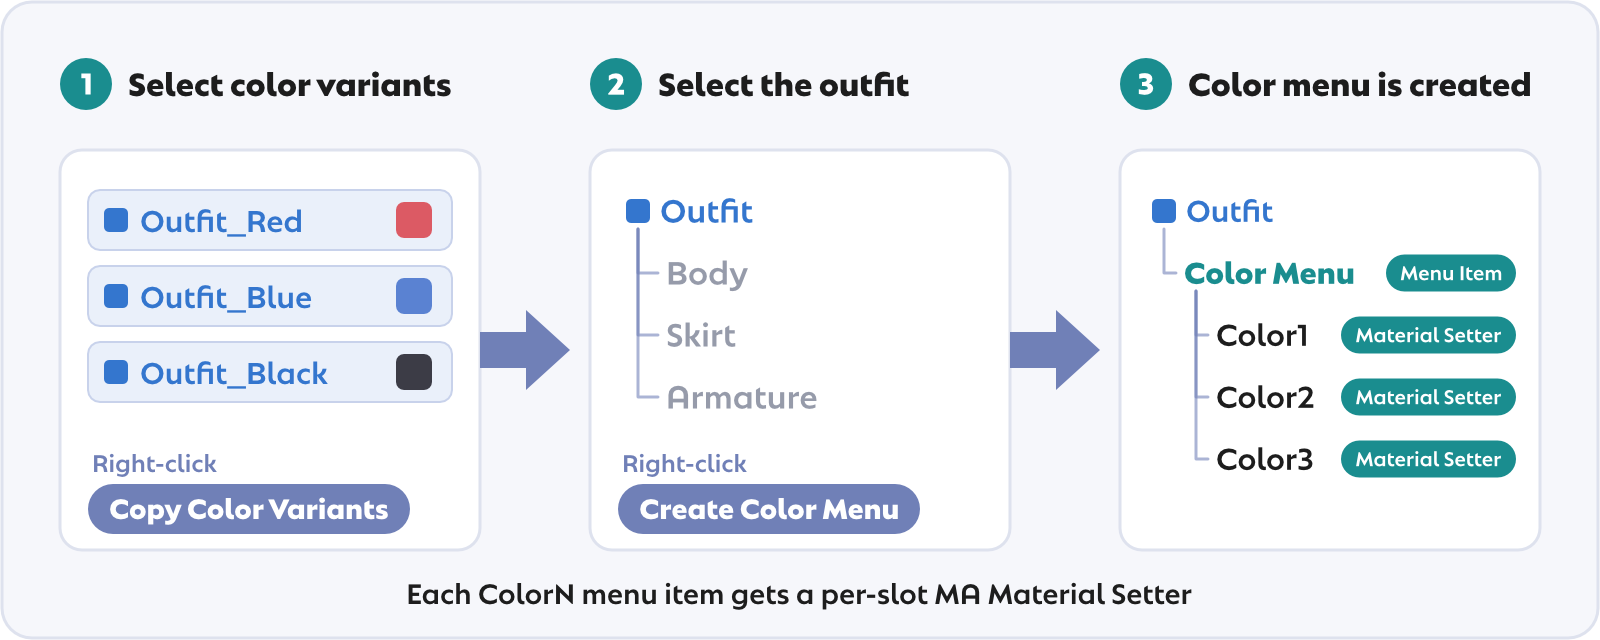
If you are unsure of the steps, open [How to Create Color Menu] from the right-click menu at any time to review the workflow and see a list of the currently copied objects.
A "Color Menu" with numbered color variations (Color1, Color2, etc.) is automatically created. Create Color Menu generates Material Setter components per slot (recommended for most cases).
For special cases, the Advanced submenu (shown after copying) offers alternative generation modes:
| Command | Description |
|---|---|
Create Material Setter (All Slots) | Create setters for all slots (for manual customization) |
Create Material Swap | Set materials by replacement rules |
Create Material Swap (Per Object) | Create individual swaps per object |
Material Setter vs Material Swap
Material Setter is recommended for most use cases.
| Material Setter | Material Swap | |
|---|---|---|
| Assignment unit | Per slot | Per material name |
| Same material → different targets in one mesh | Supported | Not supported |
| Use case | Most cases | Simple configurations |
Cases Material Swap Cannot Handle
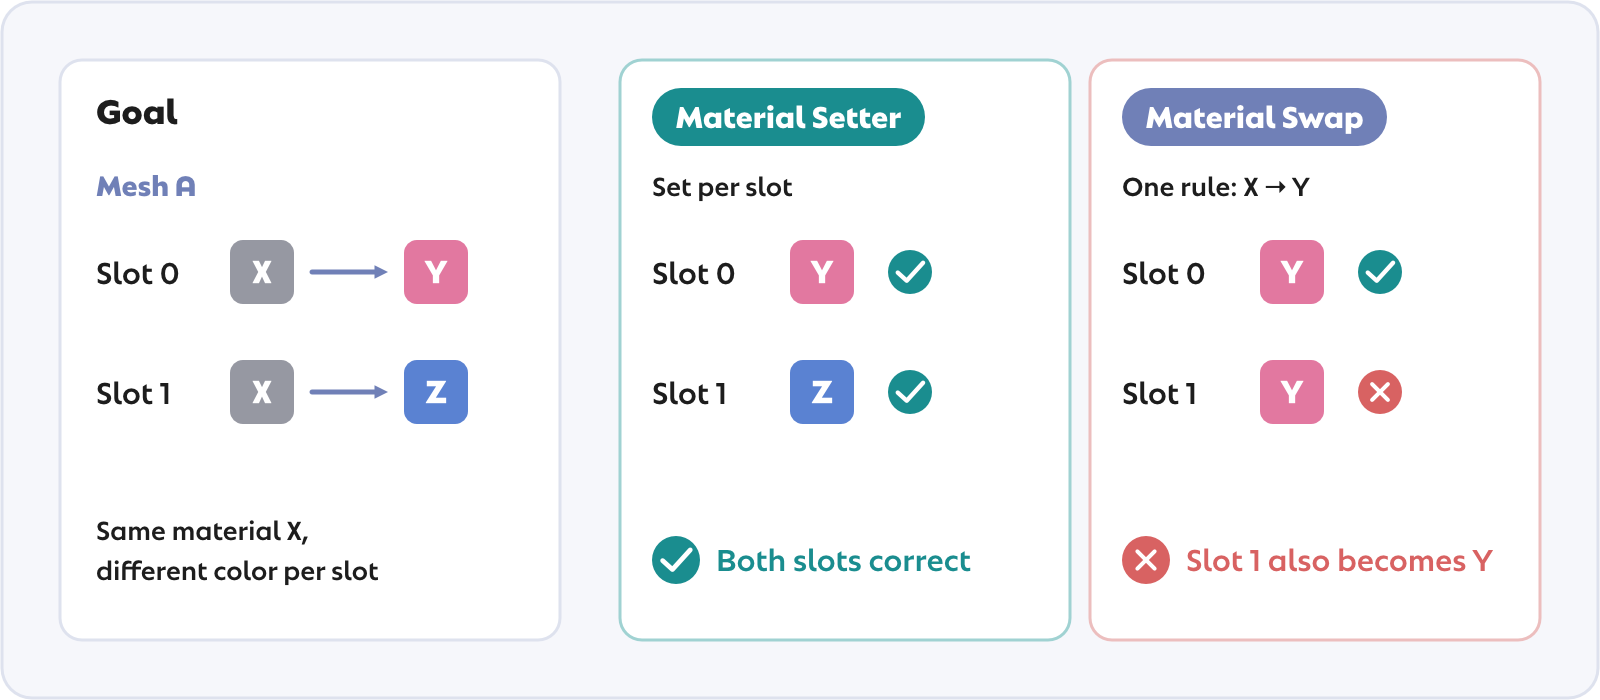
Mesh A:
  Slot 0: Material X → want to change to Material Y
  Slot 1: Material X → want to change to Material Z
Material Swap can only replace "Material X" with one material, so both slots end up with the same result. Material Setter can specify per slot, allowing each to change to a different material.
Material Slot Remapping
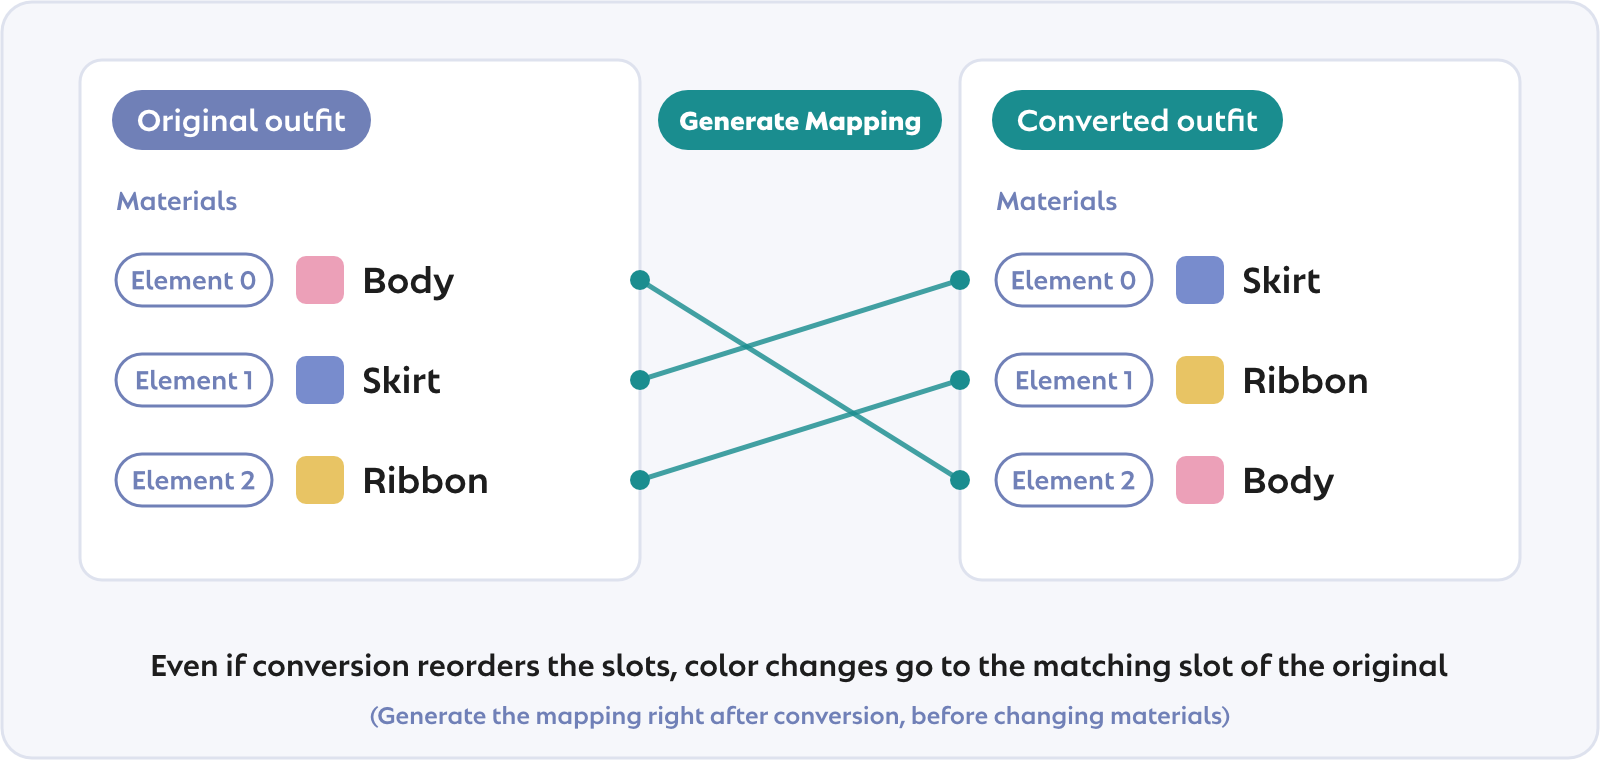
When an outfit is converted to fit another avatar (e.g. with auto-fitting tools), a renderer's material slot order can change, so an index-based color setup ends up on the wrong slots. Add a remapping component to the converted outfit and point it at the original outfit to fix this.
Usage
- Right-click the converted outfit →
Add Material Slot Remapping - Set the original outfit as
Reference Prefab→ clickGenerate Mapping - Run
Copy Color Variants/Create Color Menuas usual — generation follows the mapping so colors land on the correct slots
The mapping is generated from material references, so generate it before changing the converted outfit's materials (i.e. right after conversion).
After generation, only the slot correspondence (indices) is stored, so changing the outfit's materials afterwards does not break the mapping. When the same material (or an empty slot) occurs more than once, the slot order cannot be determined uniquely. A confirmation dialog and warnings identify these cases; review the estimated mapping and adjust it manually in the Inspector when needed.
Performance Note
Material Setter / Material Swap generate material replacement animations at build time, so meshes targeted by a color change menu are excluded from automatic mesh merging by AAO: Avatar Optimizer's Trace and Optimize. The unmerged meshes cost extra draw calls.
When you can spare the effort, merge the target meshes with Merge Skinned Mesh (Color Menu Safe) to reduce the load without breaking the color change menu. Meshes that are toggled on/off, such as bags, should normally be left out of the merge — see the linked page for details.
Access
Right-click in Hierarchy → Kanameliser Editor Plus > Copy Color Variants / Create Color Menu / Advanced / [How to Create Color Menu] / Add Material Slot Remapping
Verbose Matching Logs
When automatic object matching does not produce the expected result, enable verbose logging to see full match decision details in the Unity console.
Toggle: Tools > Kanameliser Editor Plus > [Settings] > Verbose Matching Logs